Format TF memory card
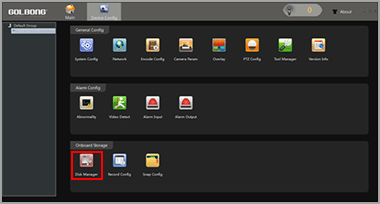
1.In the "Main" , Enter “Device Config” and Click “Disk Manager”
2.Select the memory disk from the list
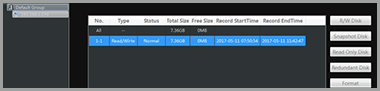
NOTE: Only the model with TF memory card slot, and the TF memory card is installed will display memory information.NOTE: Class 8 or higher TF memory card is required.
3.Click “Format” to erase all the data from the TF memory card.
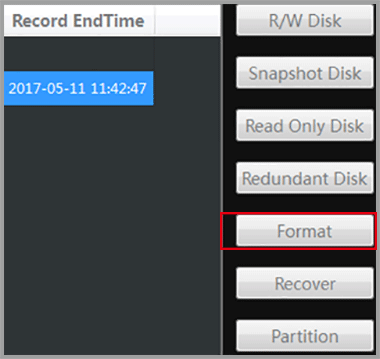
Important: All the data will be erased with format operation.NOTE: The TF memory card can not be viewed by windows PC directly.
Turn on the TF memory card recording
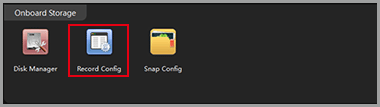
1.In the "Main" , Click “Device Config” , Enter “Record Config”
2.Choose “Auto”, Click “OK” to save.
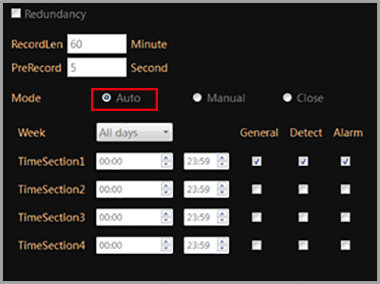
NOTE: Check “General” will keep camera recording continuously. Unchecked the “General”, the camera will only record the footage when the motion or alarm input is detected. It can save the hard drive space.
Enable Motion recording
1.In the "Main" , Click “Device Config” , enter “Video Detect”, a new screen appear.

2.Click the enable to turn on the motion detection.

3.Choose sensitivity level from “Sensitivity”.
Important: Over sensitivity could cause much more false alarm.
4.Click the “Region”, Mark the interested area with blue block.
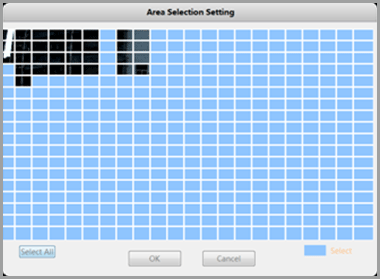
NOTE: The blue block is selected area.
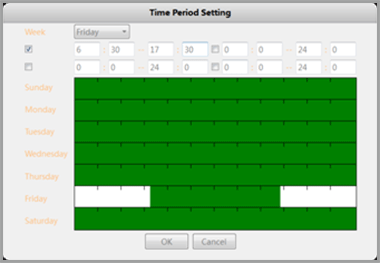
5.Click Period, a new dialog pop up. Customize the schedule to activate the motion detection, click OK to save.

6.Enable the checkbox next to “Record”, click OK to save.

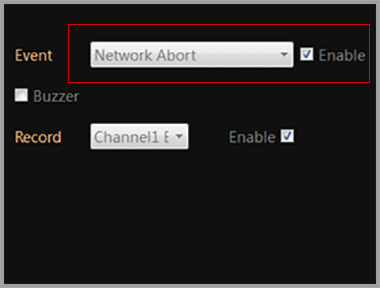
Enable network dis-connection recording
The IP camera can initial on-board recording when the network is dis-connected.
1.In the "Main" , Enter “Device Config” , Click icon “Abnormality”
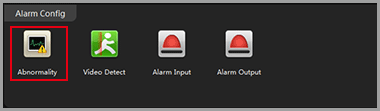
2.Select “Network Abort” from event list, Mark both “Enable”, Click OK to save.
Optional: Enable External Alarm Detection Recording
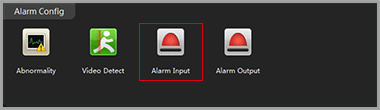
1.In the "Main" , Enter “Device Config” , Click icon “Alarm input”, a new screen appear.
2.Click the enable to turn on the external alarm detection.

3.Select the alarm type.

NOTE: Normal Open means the alarm device stays OPEN, it generates digital signal to the camera when the status change to closed.
4.Click Period, a new screen pop up. Customize the schedule to activate the external alarm detection, click OK to save.
5.Enable the “Record” and “snapshot”, click OK to save.

NOTE: The alarm input detection requires external alarm devices such as door contact is connected to the camera properly.

